Showing posts with label materials. Show all posts

Thursday, December 14, 2006

Starting the Hearth

Yesterday Steve finished laying the slate in the entryway and started working on the hearth! Here's the hardybacker that the slate tiles will attach to, attached to the walls.

Here's a close up of the air space between the sheetrock and the hardybacker, showing the 1/2" copper pipe spacers. It's a pretty clever system. He uses long screws, slides the pipe over them, and tightens it all down to the wall. It's very sturdy. There's an air gap at the bottom and the top will be left open, which will create a convective air current. It'll simultaneously keep the sheetrock from getting hot and act as a heat exchanger to warm the air in the room.

The brazilian black slate tiles will be attached to the hardybacker, and also will wrap around the sides so the air gap doesn't show.

I better think about getting some firewood!

Friday, November 24, 2006

Laminate Laminated

Upstairs countertops finished! The bathroom:
The Laundry room:
You can't really tell from the pictures, but this laminate is not a solid color, it has little flecks and threads of darker and lighter warm orangey-browns in it.
Pretty much all the laminate we are using is from Pionite, in case you were wondering.

Monday, November 20, 2006

Last of the Marmoleum

Glue:
Marmoleum:
And about an hour for Jim the Flooring Guy:
And Voila! The floor in the downstairs bathroom is finished. I'd post a picture of the finished floor except that my camera ran out of batteries.

Someone in the comments a while back asked for more information about Marmoleum. Pretty much all you ever wanted to know can be found here.
Basically, it's a more-or-less natural, non-vinyl, durable, water-resistant floor material that comes in a roll and is glued to the subfloor. It's pretty similar to what people used to mean when they said "linoleum", back before that came to mean vinyl. It comes in lots of pretty colors, typically with a "marbled" pattern to them. It is really nice stuff. I first became aware of it after my parent's basement flooded (busted pipe) and they redid the entire basement with marmoleum, replacing the old vinyl flooring that was ruined by the water. It really does have a completely different feel to it than the vinyl - much nicer. Even if you don't know (or care) anything about the totally evil toxicity of vinyl, you would notice the difference!

Friday, November 17, 2006

Stay Off Of Tile.

Just say No! to Tile abuse. (Hahahahaaaa! I made a funny. So why don't I hear you laughing?)

Ok, but seriously, yesterday Mark and Steve cut & laid down all the slate in the sunroom! What a nice surprise - I only expected to see a stack of boxes and some lines drawn on the floor, but they really went all out. The gluey stuff underneath the tile takes some time to dry, and then they'll do the grout in the cracks. Steve had the room well blocked off to keep anyone from walking on the tile before it set:
There's some dust and smears and stuff on the tile, but this is more or less what it will look like. It's really beautiful, not so much black as a really dark gray with lighter speckles and veins subtly running through it.
And zooming in for the ultra-closeup, you can even see the ridges in the glue showing in the crack between the two tiles. The gage (thickness) on these tiles is really nice and uniform, which will make for a nice clean finish and smooth walking surface. There's still some variation of course, because it is a natual material, but these are a good quality tile. A lot of the slate tiles you see on the shelves at, say, Lowes, really have too much variability in the gage to make a safe walking surface.
This same "Brazilian Black" slate tile will be used for the hearth, which they are hopefully going to start on today. It will also be mixed with some of the "China Multi" multi-colored slate tiles for the backsplash along the kitchen counters. I can't wait until I can walk on it!

Wednesday, November 15, 2006

Trimity Trim Trim Trim

Yep, more trim got done yesterday. It's a lot more exciting than it sounds. Here's a self-portrait done in the newly trimmed out upstairs bathroom window...
Also, in case you were wondering, the trim we are using is all 100% recycled/reclaimed wood MDF. Each peice has a little sticker on the back, like the one below, which tells how much recycled and reclaimed material (no, I don't know what the difference is either) is in it. I was surprised to see that they aren't all the same amounts, I guess they make different stickers for different batches or something.
It would be nice to be able to use real wood for the trim, but the budget just couldn't do it. Maybe in 25 years when we're ready for a remodel/update. :)

Tuesday, October 31, 2006

Counters, marmoleum & trim, oh my!

The counters were put down on top of the kitchen cabinets yesterday. Not the laminate, just the plywood that the laminate will go on top of, I mean. Even though it isn't the finished surface, it ties everything together nicely. Also, I don't think I pointed out before that the back of island was wrapped with a matching black-finished veneer. It's really looking nice.
Here's the workbench in the laundry room, which was started yesterday. Also in this picture you can see the marmoleum which was installed Sunday. This room is always going to feel sunny and cheerful, even on rainy winter days. Or nights, for that matter.
Here's the marmoleum in the upstairs bathroom. It's the same pattern as the laundry room. This pattern is great, not only is it pretty but it will hide all kinds of dirt!
A big stack of trim materials was delivered yesterday and piled up in the living room. It's wierd to think that it takes so much material to trim out a house, but I know that it will. The interior doors and closet doors were also delivered, and are stacked in the mudroom, ready to go.
I spoke to Mark a little bit ago, and he's out with the plumber measuring the height of the feet of the clawfoot tub, and they'll be getting that drain fitting finalized either today or tomorrow. I'll kind of miss being able to tell people that we decided to install an indoor litterbox for the cats when the spacer box with it's pea-gravel fill is removed from the bathroom floor and replaced with a drain and some quickcrete. Oh well. Hardly anybody fell for it anyhow.

Also, the painter is supposed to be on his way out to get started on the exterior! Stay tuned for more on that in the next few days...

Friday, September 15, 2006

Design Specs

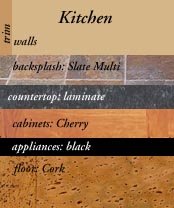
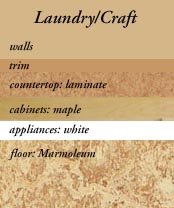
Here are the design elements, room by room. Robin e-mailed me the specs and I went to all the manufacturer's websites and clipped pictures of the various elements, then combined them together into room-specific swatches. Pretty nerdy, huh? It was so much fun I kind of got carried away. :)


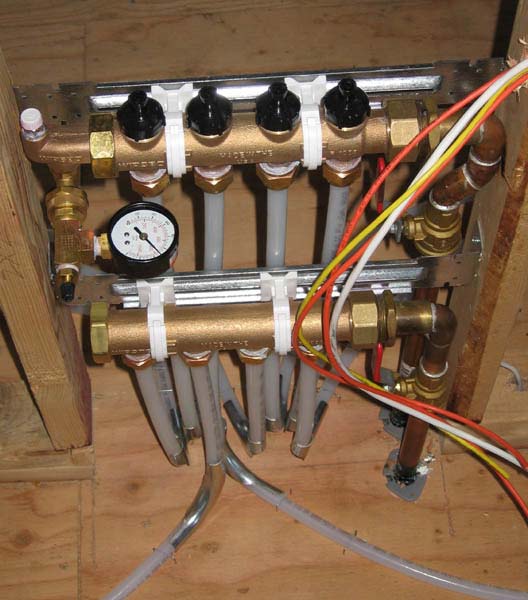
All the light fixtures, doorknobs, and most of the plumbing fixtures throughout the house will be oil-rubbed bronze, which is basically a matte dark brown.

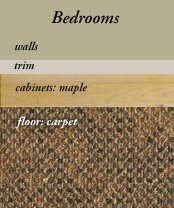
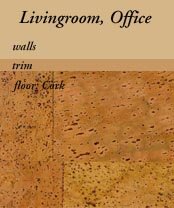
You'll notice that most of the rooms have the same color of walls, a warm tan (it's called Boardwalk) with a darker tan (Desert Beach) for the trim. We may paint some rooms or accent walls with different colors at some point, but with the pro painters it costs extra every time you have them change colors. That's because they have to clean out their equipment each time. So for now we just have one color scheme for the bedrooms and one other for the rest of the interior.

The doors will be painted the same colors as the walls. The bedroom doors will have the bedroom wall color (Embassy Green) on the inside and the hallway color (Boardwalk) on the outside.

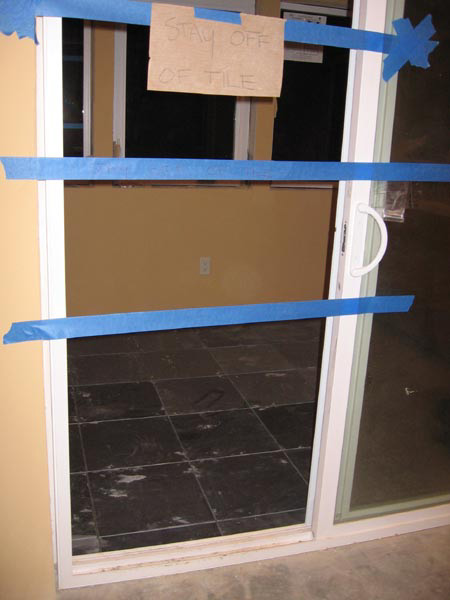
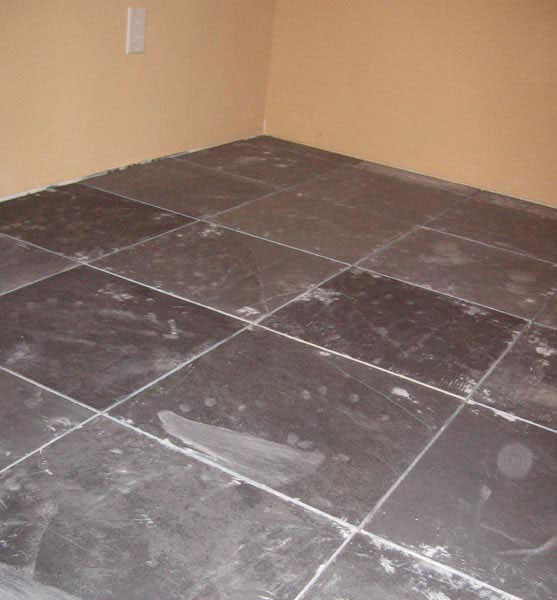
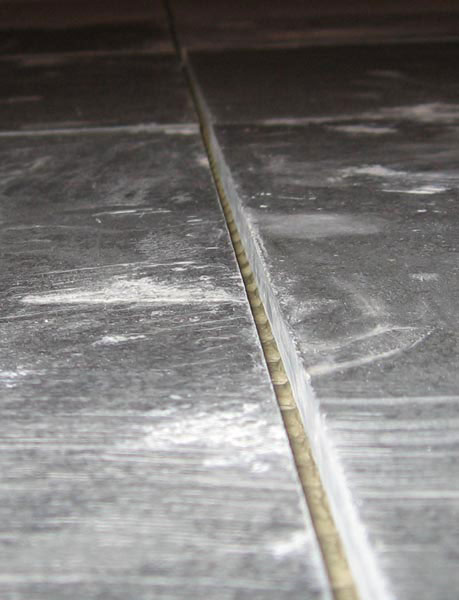
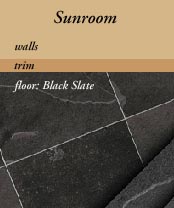
The hearth area will be done with the same black slate as the sunroom floor, in 16" square tiles. There'll be a decorative band of 2x2 multi-colored slate tiles between the top black tile and the next one down, just for fun.

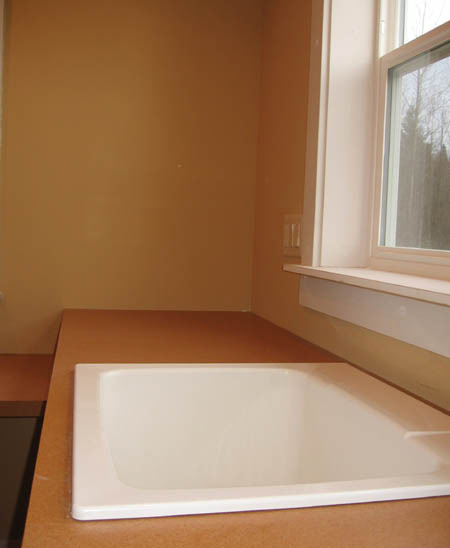
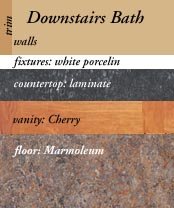
In the bathrooms, there will be tile for the backsplashes around the vanities. The downstairs bath will have mainly white glass tiles with a thin black tile outline. The upstairs will have 4 different colors of tile mixed randomly together. The colors are red, yellow, blue and green, in tones that coordinate with the colors in the mexican sink.

I suppose I don't have to tell you that I'm beside myself with excitement, and can hardly wait to see it all installed...

Thursday, August 17, 2006

Totally Tubular

As promised, the tubes are laid in all the upstairs rooms. As I mentioned previously, we'll be pouring(on Friday) a 1 1/2" layer of lightweight gypsum concrete over the tubes and that will bring the floor up to its nearly finished level.
For the finished floors, there'll be carpet up the stairs, in the hallway and in each of the three bedrooms. The Laundry room and Bathroom will have marmoleum (a non-vinyl, more-or-less natural linoleum) floors. The manifold is located in the closet of the middle bedroom. (Appologies again to our future kid who gets stuck with that room!)
The tubes used for the radiant heat are hePEX which is supposed to be the good stuff - made specifically for radiant installation. It has an oxygen barrier in it, which is important because it means that the boiler won't rust out, as happened to my co-worker Steve. I don't understand the chemistry behind it, but I DO understant that while the hePEX costs a bit more on the installation than tubing that isn't oxygen-blocking, it isn't as much as repairing the whole system in a few years!

You can also see in this shot that the tubing loops into the closets, just enough to keep the chill out. It does not, however, run under the washer, dryer and cabinets to be built into the laundry room. It's really nice how this system puts the heat where it will be most needed.

Thursday, July 20, 2006

Intermission

So it looks like the framing won't begin until next Tuesday. In the meantime, I'm meeting with Robin to select stain and paint colors. If I select the stain today, I might get to spend the weekend dipping shingles! I bet that's a real hoot. (Actually I'm looking forward to it. Ralph Wiggins voice: I'm helping!)

I've had a couple of meetings already with Robin (Schramer, Mark's wife & partner who is an interior designer) to select materials and design stuff for the house. It's pretty fun to pick things out, although it would be totally overwhelming without Robin's help. She knows what stuff costs, which of the 7 million not-quite-but-almost-the-same choices is the best deal, how long it lasts, how well it wears, what it's made from, where it comes from, what it looks good with, and all that important stuff. Which means I show up and she's already got a handful of colors or tiles or carpet swatches set out for me, and I don't have to go through the whole entire universe of options before I make a decision.

Earlier this week we did light fixtures. It's pretty amazing how much the price difference can be between two (or twenty) fixtures that look almost identical. One thing I'm sure of in this life: I will never think to myself "Damn, I sure wish I had a handblown Italian glass shade on the porch light."

Cheapskate that I am, I came in underbudget on light fixtures. Which is good, because we're sure to go overbudget somewhere else.