Showing posts with label clawfoot tub. Show all posts

Thursday, January 21, 2010

Bathing Cuties

Last weekend we had a spontaneous gathering of friends both young and old at our place. After spending some time playing out in the yard getting dirty, Moira, Kiah and Conan really enjoyed splashing in the big clawfoot tub together. It's so nice now that Conan is getting old enought to really play with other kids, he and Kiah especially have a lot of fun together.


You may remember that Conan hated baths when he was very young, but now he loves them. He still mostly takes showers these days, so baths are a special treat. Even with showers though, he often wants to go get back in with his papa after I get him dried off and dressed in his pjs. Splashing in the water is just SO much fun, indoors or out. He's even figured out how to get enough water out of his sippy cup to make a splashable puddle, which is not so great for our floor but still really cute.

Saturday, November 17, 2007

Clawfoot tub, how I love thee

Instant home spa: fill tub with really, really hot water. While the tub is filling, light candles, find a book, make a cup of tea, and inflate the bathtub pillow. Bath salts are optional. Make sure you have some nice clean towels on hand. Then get in the tub, shut the world out and relax...
Ahhhh.

Seriously, I do love this bathtub. It's so wonderfully deep compared to standard modern tubs. I could wish for it to be slightly longer (it's only a 5-footer) but since it was free (a family heirloom) I'm not going to complain. Before this tub I only rarely took baths because in a regular tub its just not worth the time it takes to transform the utilitarian shower area into a comfy soaking environment. I'm actually glad we didn't try to install a shower fixture for the clawfoot, and not just becuase it would have been difficult and expensive - it means that this space is always 100% ready for a relaxing bath. There's really nothing better to restore the spirit on a dark cold night after a long day at work. Having this tub is worth every minute I spent restoring it to good condition.

Tuesday, December 19, 2006

Indoor Plumbing - teh R0x0rz

As you can see below, I remembered my camera last night. So here's pictures of all the bathroom plumbing fixtures & faucets for your viewing pleasure. First, the lovely downstairs bathroom vanity, with its glass tile backsplash all grouted:
Here's a close up of the faucet, photographically proving that when you turn the handles, actual WATER comes OUT. Gotta love that!
Here's the clawfoot tub, in its nook in the downstairs bathroom. The drain and input lines are hooked up, but the faucet is not - yet. But it will be soon. I'm pretty impressed with how NICE the tub looks. For comparison, here's a post on the restoration process. Or you can click on the "clawfoot tub" tag at the bottom of this post to see a round up of all the posts about it.
Also, there is the toilet. I can't think of anything particularly interesting to tell you about the toilets, except that I'm happy to see them. Most people take them for granted, but not me. See, when I was little, we lived in a one room cabin out in the woods which did not have a toilet. We had an outhouse instead. (Why yes, my parents were hippies. Why do you ask?) Let's just say I have a thing for flushing.

In the upstairs bathroom, we have the mexican sink, looking lovely as always with its brightly colored tile backsplash - now with grout! - and its oiled bronze faucet. This is actually the same faucet as the one for the downstairs sink, the only difference is the downstairs one has porcelain handles.
Here's the shower head we chose, in oil-rubbed bronze of course. I can't wait to try it out...
This is the faucet and temperature control knob thing for the shower/bath. It's part of the same line as the sink faucets, so they all go together.

I've got about a million photos to post today, but I'll do separate posts for different topics. Check back later!

Sunday, October 29, 2006

Clawfoot Tub Finished

At last! Here's Cary taking the masking off:
And here it is with the feet leaned up against it.
Doesn't it look wonderful? For perspective, here's what we started with, inside:
And outside:
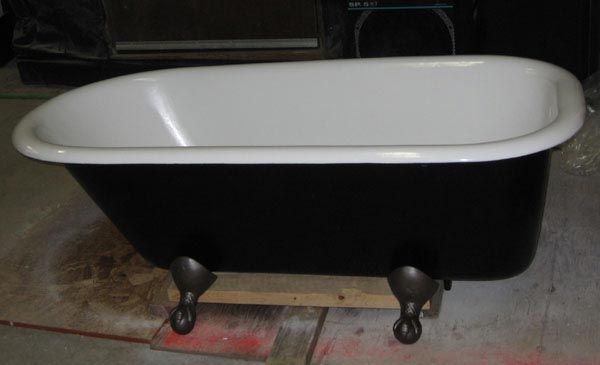
Yeah, that took a little elbow grease, a few dollars, and several hours. (um, can you say understatement?) But it's worth it, to be able to say we did it ourselves.

Wednesday, October 25, 2006

Inside & Outside

More Progress on various fronts yesterday. Outside, the soffits were finished, with a neat little ventilating strip running all the way around the porch roof. It's a little metal grill, like a miniture register, set in a few inches from the outside edge of the eave. It looks good and is also very funtional.

Also, someone (probably Steve) started primering the fascia boards white. Obviously still a work in progress, but off to a good start.

Inside, the cabinet installation continues! The cabinet in the far right of this picture (the one with one door on) is the one that will support the kitchen sink. Out of the picture to the left is where the refridgerator will go.
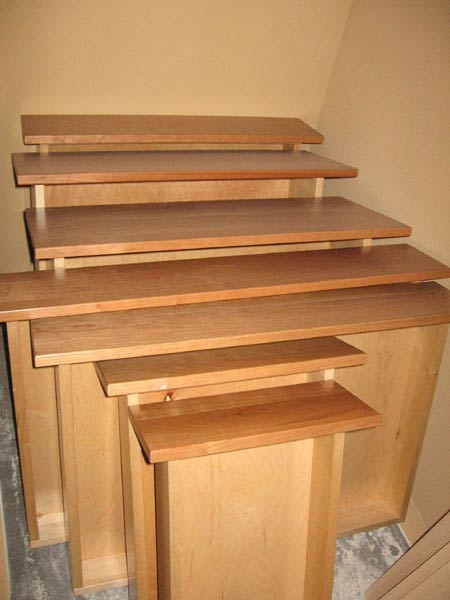
These are the drawers that will go in the middle unit in the above pictures, among other places. They are currently stacked in the pantry. I think they are really striking, all stacked together like that, and you can really see how beautifully the paint color compliments the wood.
In other news, the fifth coast of porcelain/epoxy on the bathtub turned out beautifully. It's glossy, smooth and uniformly white - everything I wanted in a bathtub! It's still possible to see some spots where I didn't do a perfect job fixing some of the chips, but I can live with that. Considering what we started with and what we went through to get it back into shape, I think it's actually good that it doesn't look precicely perfect. I'd hate for anyone to mistakenly think I just toodled out to the store and bought a NEW tub like some kind of wuss. Nope, this tub's got character, and history, and no amount of restoration can cover that up. And it's a good thing, too!

Monday, October 23, 2006

Now Featuring Color!

That's right, the painter came out on Saturday and painted the entire interior of the house! I was pretty impressed, considering that a) he wasn't scheduled to come until Monday; and b) when he showed up Saturday morning the power was out. D'oh! Mark called at about 11:00 and told me about it, so I called a neighbor to find out if everyone's power was out or if it was just something wrong at our place. She confirmed that the power had been out for about 20 homes in our area since 6 am, but that the power company said it'd be back on by noon or one. Since Cary and I had been planning to head out there anyway to put the finishing touches on the clawfoot tub (more on that in a minute) I told Mark we'd let him know when/if the power came back up. So, the power came back on about 1:15, I called Mark, he called the painter, and about 45 minutes later he was on the job. Cary and I didn't even get a chance to meet or talk to him, he was inside spraying paint so fast! We had to leave before he finished (Grandma Joy was serving apple pie at 2:30 - couldn't miss that) but we came back on Sunday to have a look. All the windows are still masked off with plastic so the lighting is a little wierd/dark, but here are the first shots of our house in COLOR:

This is the color that most of the house is painted, seen here in the sunroom.

Here's Cary in the front bedroom. All the bedrooms are done in this light grey-green color, which is very calming and restful. Behind him you can see the warm yellow of the stairwell through the open door.

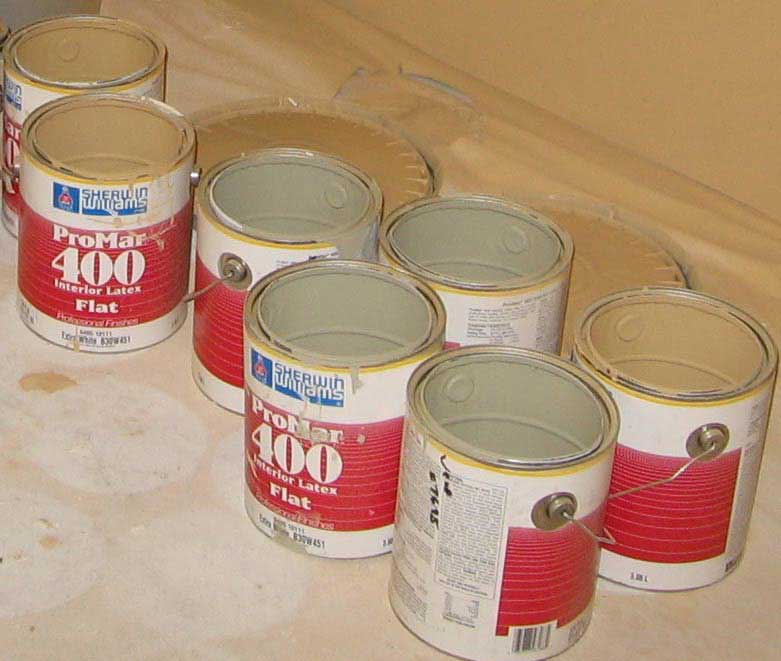
Here are the actual empty cans left by the painter, which is about the only place you can really see both colors side-by-side. I think this picture also gives the truest sense of the colors. Like I mentioned above, with the windows still masked off (and painted over) the light inside is dim and tinted.

Now that the paint is done, they'll strip off all the masking and then start placing the cabinets. I can hardly wait!

Oh, and about the bathtub: we put a 3rd and 4th coat of the porcelain/enamel on the inside over the weekend. We're finally starting to get a good smooth finish that covers all the dings, runs, and dark spots. There is enough left in the spray can to do one last coat tonight, and then I think we'll be done! Also, I did the feet with a metalic dark bronze paint, which I think looks really nice and which I hope will match the oil-rubbed-bronze finish on the faucet and drain hardware. I'll get some more pictures up on the site here once the 5th (and Final - Yay!) coat is dry...

Thursday, October 05, 2006

Soffits & Trim

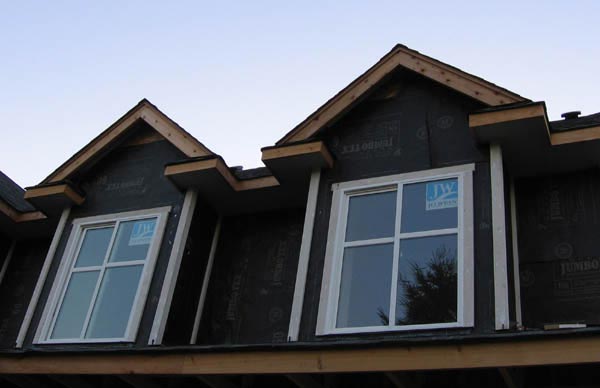
The second floor windows and corners were trimmed out yesterday, and the tarpapering was finished in preparation for the actual siding. Here's a picture of the dormer windows all trimmed out:
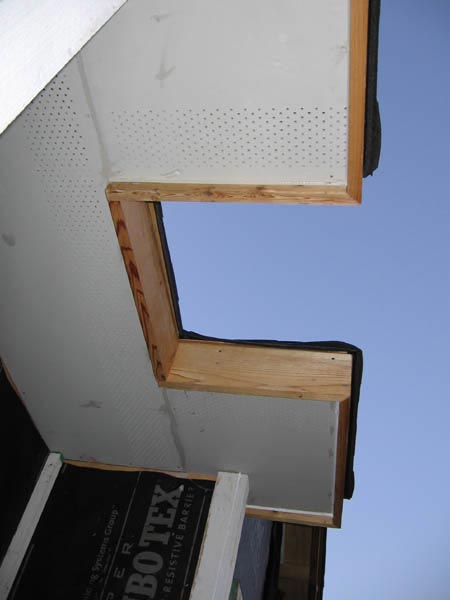
You can't really see it in the picture above, but the soffits were also closed up yesterday, with ventilated hardyboard. Here's a close up of what they look like now:
I expect a lot of siding will go up today, since it looked (to my admittedly totally untrained eyes) like they had all the prep work done. I realize it's been a while since I put up a picture of the whole house, but it's because the exterior appearance hadn't really changed for a while. The sidning will change that - you can expect a couple whole-house portraits here sometime in the next few days.

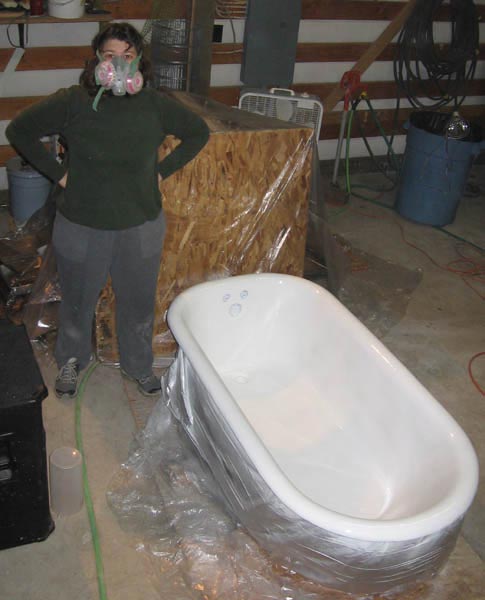
The bathtub finish wasn't as good as I had hoped on the first coat, we had some drips and runs and some "texturing" around the edges where the plastic we tented over the tub on sawhorses (to keep dust from getting on it while it dried) touched it. Drat. I sanded out what I could and put on the second coat last night. Now I'll let it cure for 5 days as instructed, and then we'll evaluate the finish. I think it's likely that we'll need to sand a little more and then go for a third coat to really get the nice smooth and even finish that I want. {sigh} But we're making progress, even if we aren't quite done with it yet.

Mudding and Taping continues, although it looks like it's pretty close to done. Again, I'm not necessarily a good judge of these things, but it just doesn't look like there's that much left to do. They'll probably leave it to dry over the weekend and hopefully the sanding can start early next week... bringing us ever closer to painting. :)

Wednesday, October 04, 2006

Bathtub Re-Enamel - first coat!

Last night Cary and I finally put the first coat of new enamel on the clawfoot tub. The preparations had taken a lot longer than I originally thought they would, but it seemed like a good idea to work methodically through all the steps to ensure we'd be happy with the finished product. I know I've written here more than once that we were gonna do it this weekend or that, but this time it's for real and I've got the pictures to prove it!
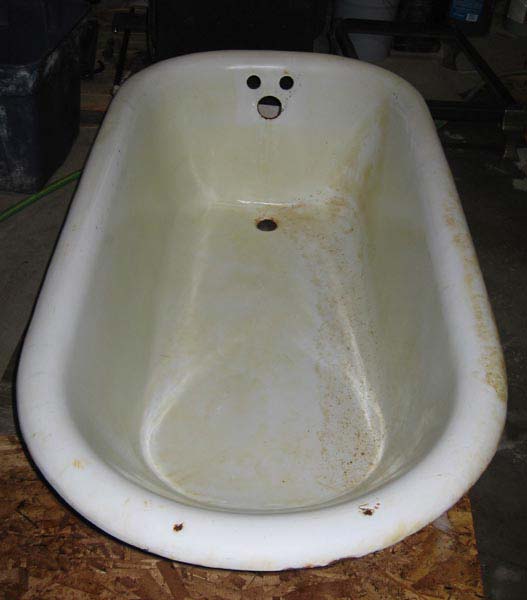
It's really amazing how different the tub looks. Going back through the pictures I've taken of the tub through the various stages is pretty impressive. This is what it looked like after I washed the dirt and fir needles out of it:

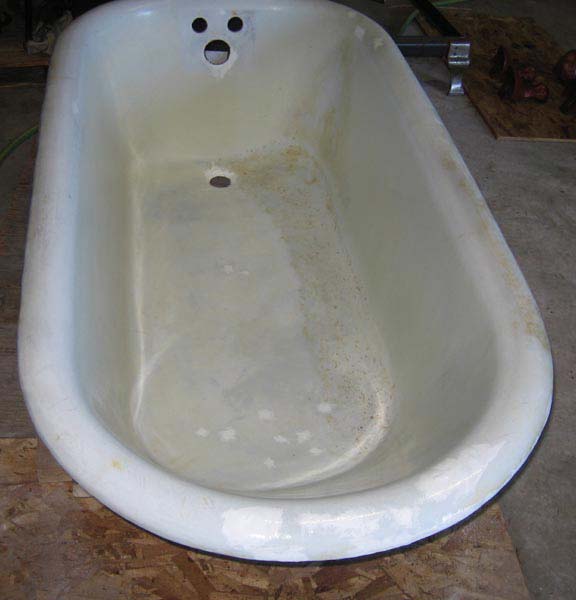
This is after several scrubbings with steel wool, simple green, Bon Ami, CLR and TSP, as well as the application of the chip fix compound which really shows how discolored the enamel was by age. Some discoloration did come off with the scrubbing (compare to picture above), but by no means all of it.
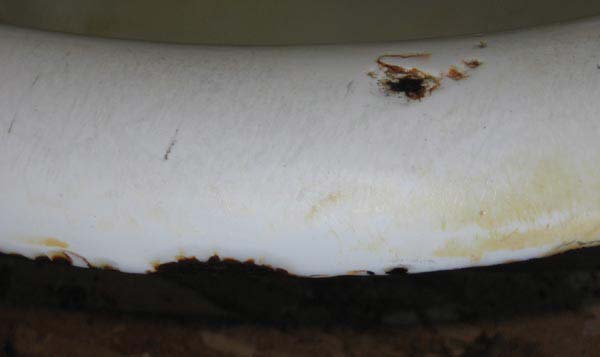
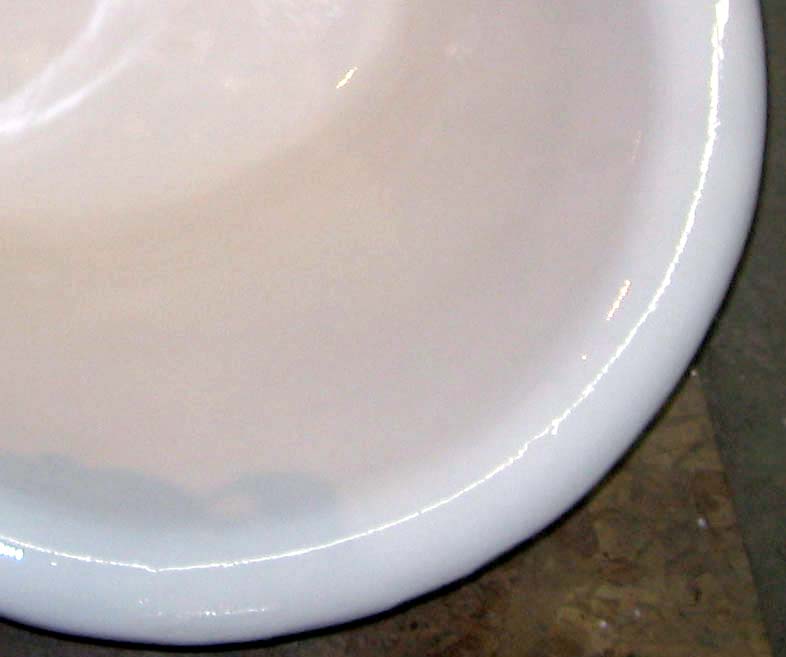
To the left here is a close up of the rim, showing a couple of the larger chips on the back rim of the tub. To the right is the same section of the rim, after several successive layers of chip-fix and last night's new enamel coating.

It's still not perfectly smooth, there are some flat spots along the rolled edge, but I doubt anyone but me will ever notice. Especially since this edge will be about an inch from the bathroom wall. :)

And here's the finished first coat. Tonight I'll go out and put on the second and hopefully final coat, after sanding out any drips (fingers crossed, maybe there won't BE any - we TRIED to spray it on lightly and evenly). According to the package, in some cases a third coat is required, but I am hopefull that we won't have to do that, because it would probably require buying another batch of the epoxy. I guess we'll know in a couple of days, when we get a look at the cured finish.

In other exciting news, they started siding the house yesterday! I'm really pleased. It will be a real releif to get the siding up on before the wet weather really kicks in. Not to mention the exterior paint. Also it looks really cool, compared to tar paper. ;)

Monday, September 25, 2006

Weekend Update

So, over the weekend I completed all the steel-wool scouring and TSP scrubbing of the bathtub. I also touched up the chips with a brush-on epoxy chip-fixing compound. It has to cure for 5 days and then may require a little bit of touch up and/or sanding, so the final coating with replacement enamel will have to wait until next weekend. It's looking a lot better than it was though.

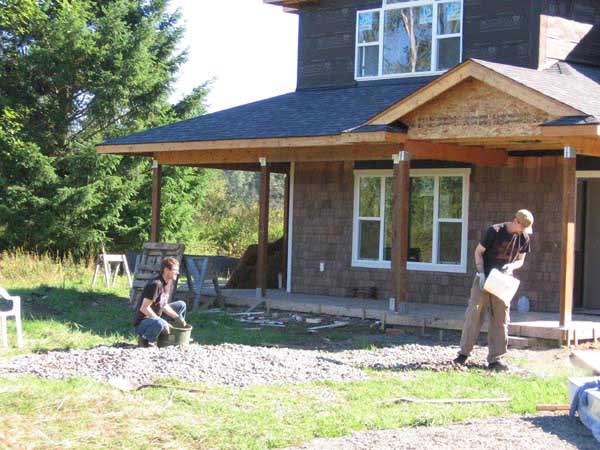
Also, Cary and Bo shoveled some left-over 2" drainrock into a sort of pathway leading from the driveway to the front porch.
The idea is to elimate or at least reduce the amount of mud tracked into the house by filling in one of the major mud pits with rocks. I know drainrock's not really the "right" stuff to make a path, but it was sitting right there and it'll work for while until we get around to a more permanent solution. Although it's nice and dry and sunny right now, we've already had a taste of the fall rains and it was obvious that something needed to be done before the mud got out of hand. The mud out there is uber-sticky. You get taller every step you take, because another half-inch of clay cakes onto the bottom of your shoe every time it hits the ground. It's next to impossible to scrape or wash it off too. So, a big thankyou to Cary and Bo for making things better!
Updates to the blog are unlikely the next couple of days, as I'll be traveling around a bit for work. Cary's going hold down the fort and take pictures of any progress while I'm gone, so I'll post up the picutres on Thursday when everything's back to normal.

Friday, September 22, 2006

T.G.I.F.

Ah, the weekend. It's so close now I can taste it. I'm looking forward to working some more on refurbishing the interior of the clawfoot tub, as well as Solly & Iris' wedding. Actually, I might be a teensy bit more excited about the wedding. :)

I have aquired everything needed (I think) for the tub project. I've got the chip-fixing compound, the TSP and the steel wool for prepping the surface, the plastic and masking tape to mask off the outside, and the two-part epoxy spray-on enamel restoration kit. The instructions for the enamel stuff are pretty crazy. Fist, the surface isn't considered sufficiently prepped until you've washed it with TSP and then scrubbed it with steel wool three separate times. To mix the epoxy you've got to put one can in the fridge for an hour and a half, and meanwhile submerge the other one in warm water. Then you link the two nozzles together and spray the warm stuff into the cold stuff. It has to sit for at least an hour before application. I figure it won't hurt to also do a chant while circling the bathtub 3 times hopping up and down on one foot with my eyes closed. Oh, and between coats (12 hours minimum) you have to keep it the fridge, and then put it in warm water for a half hour or so after you take it out. All joking aside, I'm sure that following the instructions to the letter will be very important to the sucessful outcome of the project, and so I intend to be very careful and go through all the steps exactly as described. Wish me luck!

Monday, September 18, 2006

Shhh... Insulation

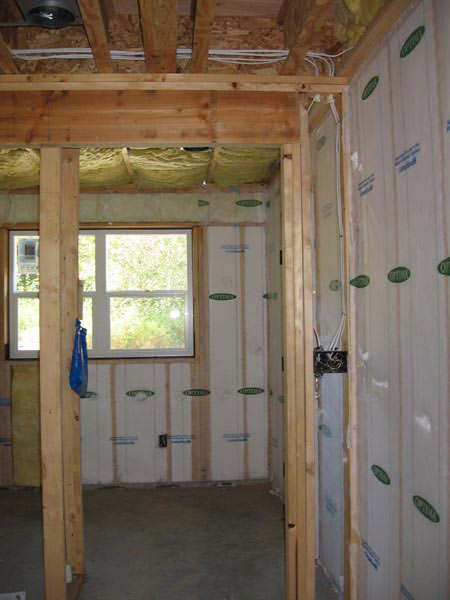
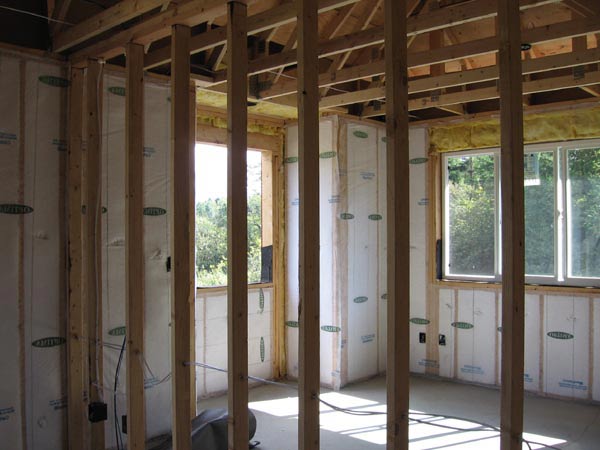
Insulation all went in on Thursday and Friday. It really changes the feel of the house, it's very, very, veeeerrrrry quiet inside the house now. The blown in stuff is really interesting. First they staple up this fabric mesh stuff, kind of like interfacing, over all the wall spaces. Then they poke small holes in the fabric and stick the blower thing (I imagine it looking like a vaccum cleaner attachment) through the hole and blow in the insulation. The insulation itself looks like a cross between dryer lint and those little styrofoam pellets that are used to stuff "bean" bags. It packs into the wall cavities and thoroughly fills in around the pipes, wires or other stuff that runs through the walls.
In a few areas they used the regular batt style insulation, for instance in the smaller spaces like above the window framing. The attic will be done with the blown in stuff after the sheetrock is up on the ceilings of the second floor. The sheetrock will be the floor for the insulation.
The inspector is coming out today to sign off on the insulation, and then we'll be 100% ready for drywall. There may be a little delay before we get to the top of the job list for those crews (hanging, taping, & sanding) though.

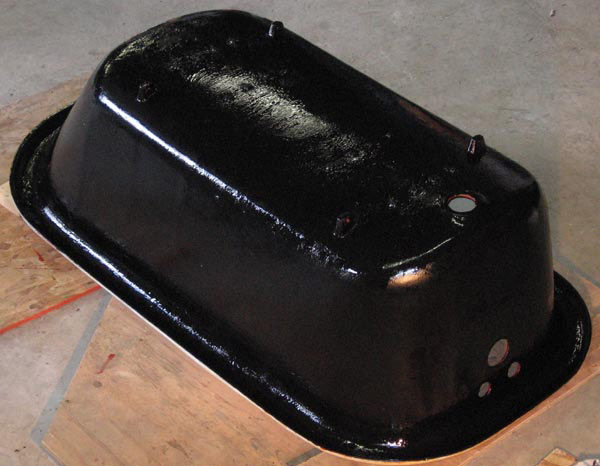
In the meantime, I will be starting the renovation of the inside of the bathtub. This weekend Cary and I painted the final exterior coat: black. I know, I liked the red too, but it really didn't work with all the other colors in the interior design, and also the color it dried to didn't look nearly as nice as when it was wet. Black looks pretty classy, as you can see. I'm thinking the feet will be white, but that's not a sure thing yet.

Monday, September 11, 2006

Clawfoot Tub Primed

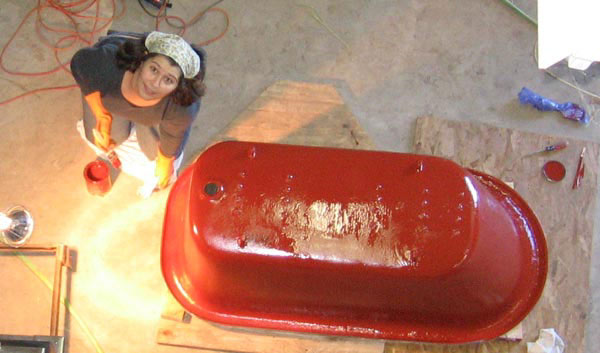
Yesterday I finally finished grinding rust off of the old clawfoot tub, and got a coat of primer on it. I was a little surprised to see that the Anti-Rust enamel primer is fire engine red. I expected more of a dull brick red. This isn't the final color (we haven't decided yet what color it will be) but it will seal and protect the cast iron from further moisture damage. And it doesn't look half bad! Cary climbed up in the rafters to take this picture:
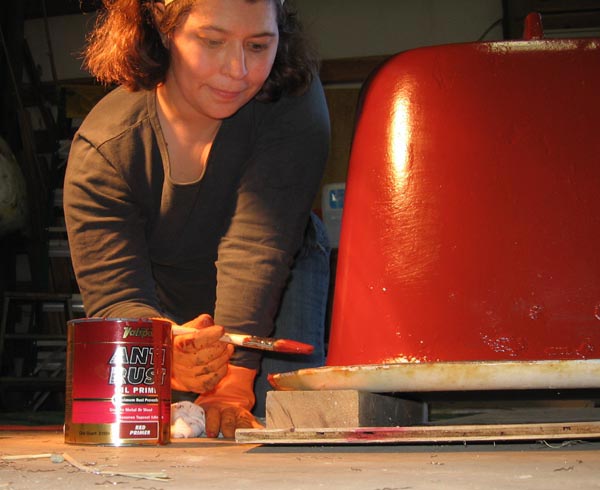
Here's a close up of me touching up the edges. The primer went on easily and formed a nice even finish. It was thick enough to cover over and smooth out some of the smaller dings and imperfections in the metal, but didn't cover up too much of the detail on the feet.
Note the discoloration of the porcelin - once the outside of the bathtub is finished I'll have to turn it over and start restoring the enamel on the inside. That will be a big job too, but for now I'm just happy that the grinding is done. :)

Wednesday, August 30, 2006

Clawfeet

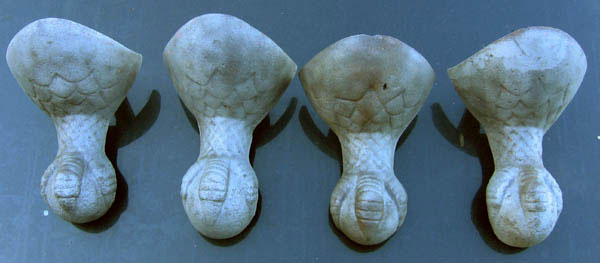
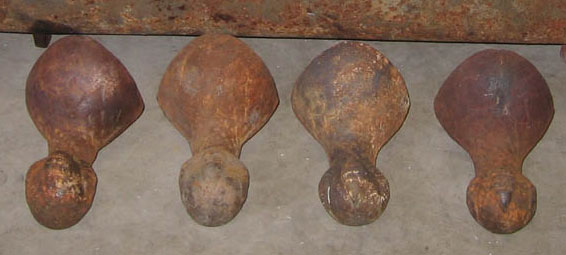
This weekend we got a chance to use Ross's sandblasting chamber to clean the rust off the clawfeet for the tub. It was amazing. In about an hour, they went from this:

To this:
Thanks are due to Ross, for letting us use his nifty machine, and to Cary for actually running the noisy bugger while I sat and chatted with Ross and Keron over a beer in the garden. :)

Electrical wiring continues at the house, but it turns out to be a really boring thing to take pictures of, even by my house-obsessed standards. Once they get the fuse box and all the switchplates and fixture backs in, I promise I'll put up some pictures.

More window framing went up yesterday, and should continue today. Utility connection lines for the cable, phone and propane are scheduled to go into the ditch today.

Thursday, August 24, 2006

Visitors & Notes from Mark

Last night when I was out grinding the bathtub (more on that in a bit) My uncle Fred stopped by to see the house for the first time. It was nice to see him and to show him around the place (and it was nice to hear all his compliments on it too! smile.)

A little bit later Lori and Allen - neighbors immediately to the east - came by for a look at the progress as well. I sure do enjoy giving tours! Allen was full of questions and enthusiasm as usual - he's such a fun kid, and he's probably the second-most excited person about this whole project, after me. I had a nice visit with them, and again enjoyed all the compliments from Lori. :)

I spoke to Mark a little earlier today, and it sounds like there's a lot going on today! Andy, the electrician I met yesterday, and Frank, his partner, are out there puting the first fixtures in place. Somebody from Barron Heating is working on the wood-stove-pipes, and somebody else is locating the utilities and figuring out the connection points. I'll get out there after work today, and you can bet there'll be pictures here tomorrow...

Tuesday, August 01, 2006

Mexican Sink

As I was preparing to leave work to go to the plumbing store, I realized I hadn't posted a picture of the cool Mexican sink that Mom & Dad gave me for my birthday last year. It's going in the upstairs bathroom. So here it is:

The other major fixture that I already have is my great-great-grandpa's clawfoot bathtub. I don't have a picture of it (it's still sitting in the bushes behind the barn) but it's a standard 5-footer, white enamel on the inside and greyish-black on the out/underside. It'll be going in the downstairs bathroom. Aparently it's going to be quite a challenge to find faucet hardware that will fit, because the holes are 3.5" apart on center, and the standard is 3 3/8".

The story of how my great-great-grandpa's tub ended up behind my parent's barn is a pretty good one. When I was a little kid, my dad's cousin Joyce bought a fixer-upper in East Wenatchee. When Grandma Mary went to see the new place, she immediately recognized the house as having been HER grandpa's house, where she (my grandma) was actually BORN! She had also spent her summers when she was a girl, so she knew it well. All the original fixtures were there, although the house was in need of serious remodelling & repair. They took everything out, and I guess they decided not to put the tub back in when they were done.

So my dad took it home, and used it to water the cows and occasionally to hold beer & ice at outdoor parties (for instance, at my brother's wedding). The feet were taken off for safekeeping. It's in great shape, considering. Just a couple little nicks in the enamel, which we'll repair. I didn't know its history until we were about halfway through the house design process, when Dad offered the tub to me. Of course we immediately made room for it in the new house. It's great that even though I'm building a couple hundred miles from the old family homestead(s), I can bring some family history with me.